Introduction to Sequencing, Loops, and Simple Animation in Scratch
Sequencing, Loops & Simple Animation in Scratch
Building foundational programming logic through ordered instructions and repetition
Scratch Basics – Sequences & Loops
Students will learn to recognise and apply two core programming concepts—sequences (the ordered flow of instructions) and loops (repeating blocks of code)—using Scratch.
Core Concepts
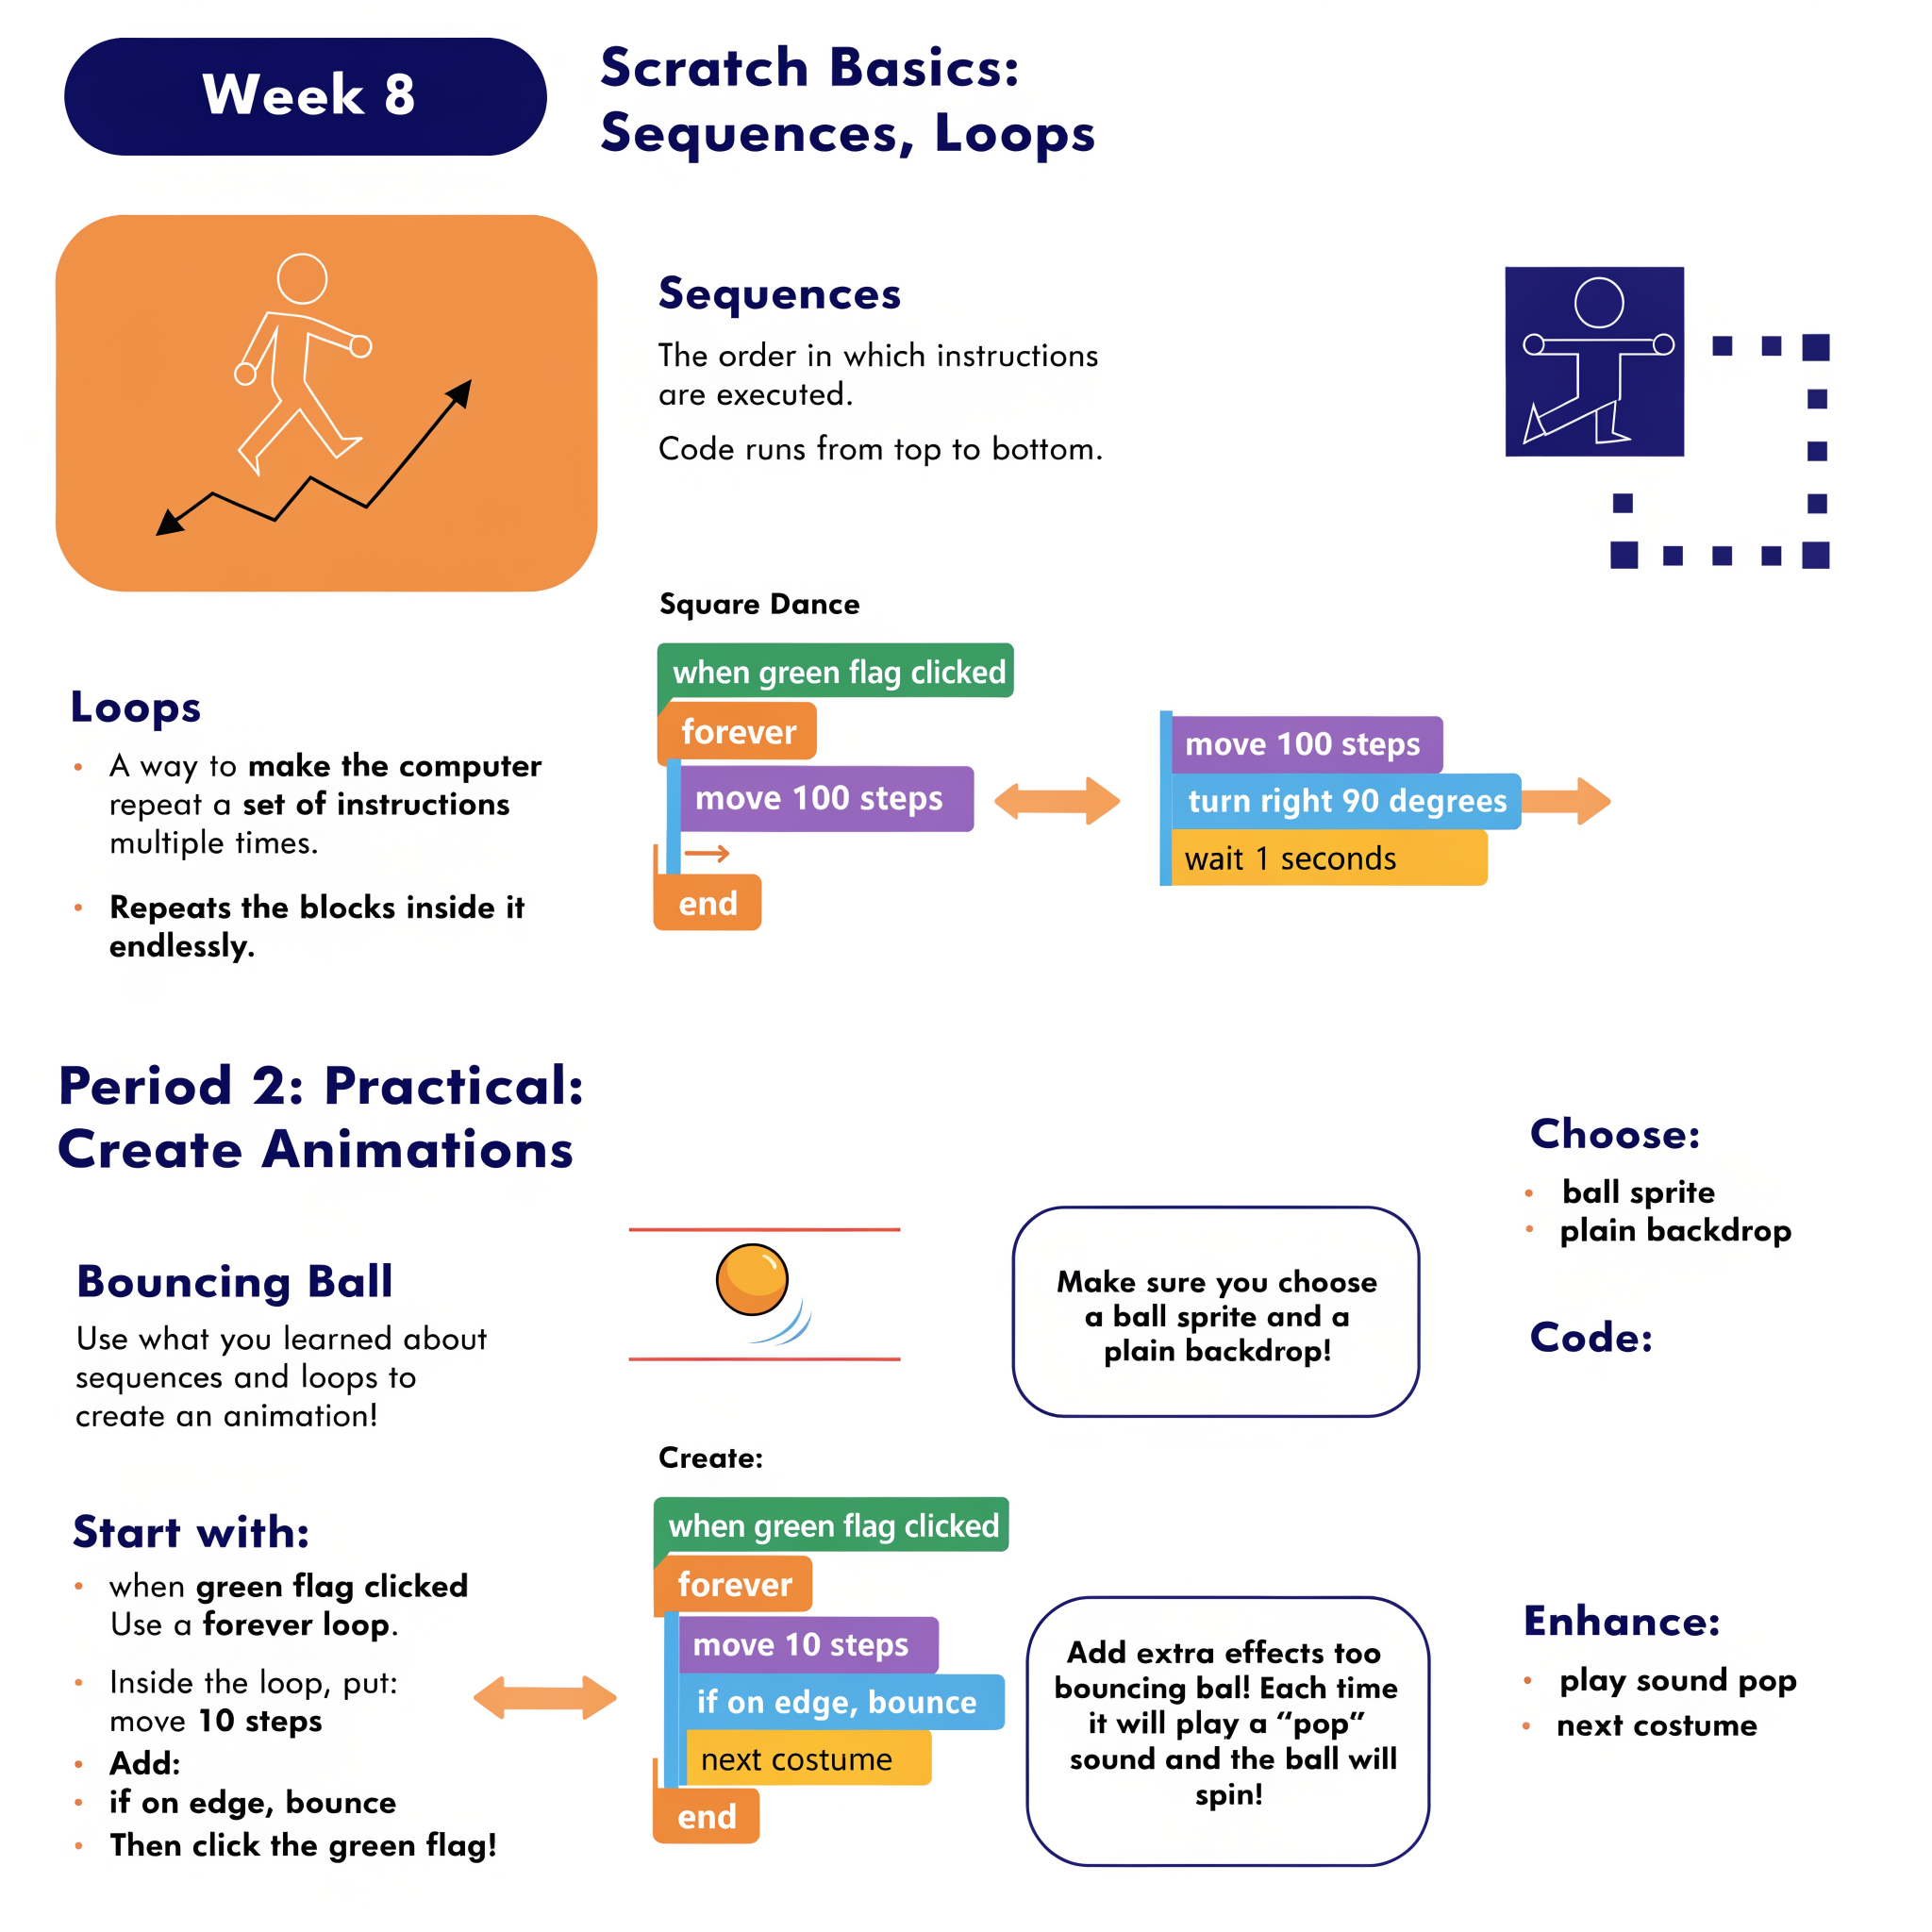
A sequence refers to the precise order in which instructions are carried out. In Scratch, blocks run from top to bottom inside a script. Changing the order changes the outcome—just like following steps in a recipe.
A loop allows a set of blocks to repeat automatically, saving time and making code more efficient. Two main types are introduced:
forever Forever block: Repeats everything inside it continuously until the program is stopped. Ideal for actions that should keep happening (e.g., movement, background music, animation cycles).
repeat [10] Repeat block: Repeats the enclosed blocks a specific number of times. Useful for finite tasks, such as drawing a shape or moving a set number of steps.
Putting It Together
This script makes the sprite trace a square path repeatedly. Each side consists of moving 100 steps and turning 90 degrees. The wait block adds a short pause between movements, making the motion easy to follow. Because the forever loop is used, the sprite dances around the square indefinitely.
Explanation: The forever loop ensures the pattern repeats endlessly. Each iteration draws one side of the square (move forward, then rotate 90°). After four iterations, the sprite returns to its starting position and continues looping.
Practical Application – Create a Simple Animation
Students will put sequences and loops into practice by building a continuous, interactive animation—a bouncing ball that reacts to the stage edges.
Goal
Program a ball to move around the stage and bounce off the edges, creating a lively screen-saver-style animation that runs continuously.
📋 Step-by-Step Instructions
- Set up the project: Choose a ball sprite (e.g., "Beachball" or "Tennis Ball") and select a simple backdrop, such as a solid colour or a court/field.
-
Start the script: Drag a
when green flag clickedblock into the scripting area to trigger the program when the flag is pressed. -
Add continuous motion: Attach a
foreverblock directly beneath the event block to create an infinite loop. -
Define movement: Inside the
foreverloop, insertmove 10 steps. This controls the ball's speed (increase the number to make it faster). -
Enable edge detection: Directly below the
moveblock, add theif on edge, bounceblock (found in the Motion category). This detects when the sprite touches any edge of the stage and reverses its direction automatically. - Run and observe: Click the green flag and watch the ball travel in straight lines, bouncing off all four walls of the stage.
Differentiation & Extension Ideas
play sound [pop] block inside the forever loop. Each time the sprite touches an edge, a popping sound will play—giving audio confirmation of the bounce.
next costume block inside the loop. This flips through costumes, making the ball appear to spin as it moves.
move [10] steps to 15 or 20 to see how speed affects the animation's feel.
stamp block (from the Pen extension) inside the loop to leave a visual trail behind the ball as it bounces around the stage.
What We Learned Today
- A sequence is the ordered flow of instructions—code runs from top to bottom.
- A
foreverloop keeps an action going endlessly—ideal for continuous animation. - The
repeat [ ]loop runs a block a specific number of times—great for finite tasks. - Combining motion and sensing blocks enables sprites to react to their environment.
- Adding sound and costume changes makes projects more interactive and engaging.
- Small changes to values (like step count) can dramatically alter how an animation looks and feels.
Test yourself on Digital Technology
Introduction to Sequencing, Loops, and Simple Animation in Scratch
Track your reading & take quizzes
Create free account